Online Resources
Franklin Carmichael Art Group presents the Beyond Curtin Park series of Online Resources – bringing the heart of the FCAG Community to you!
We hope to offer some comfort and inspiration during this time of physical distance. Through the Beyond Curtin Park series, you will find activity sheets prepared by your favourite artist instructors – great for beginners and beyond!
You will also find content highlighting art and artifacts from our Permanent Collection. Show us some of your masterpieces that you have been creating while staying safe at home!
Be sure to tag us in your photos @FCArtGroup or send us a DM for a chance to be featured on our page. And be sure to follow us on social media.
Your support makes a difference!
-
Instructor Activities
-
Permanent Collection
-
DIY Activities
<
>
Instructor Activities
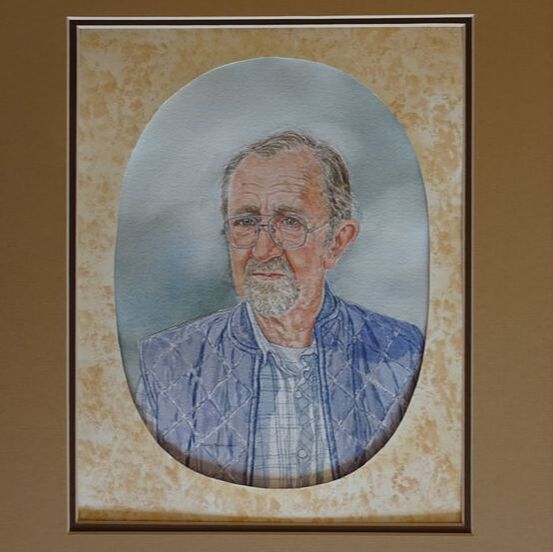
Painting a Portrait using Watercolor
|
The following tutorial details some tips and tricks that Nancy used to paint a portrait of a man named Yurek.
Nancy will also cover drawing, going back to basics with your brushes and much more. Enjoy this creative & detailed tutorial on your art journey.
| |||||||
The Hope Tree Watercolour Tutorial with Nancy Buckingham
|
"The Hope Tree” is a symbol of unity through art. Unity built with conscious thought and kind gesture. Art is a healing and unifying force that I am grateful to share. I hope to inspire fellow artists to pick up their brushes and have fun. I encourage you to share this video with family and friends. Kindly donate what you can to support my ‘art home’ at Franklin Carmichael Art Group. This tutorial is dedicated to all the artist mentors in our lives, particularly June Thomson, who we recently lost. With her magic brushes, June shared her talent and blessings with hundreds of students.
|
|
Demo with Nancy Buckingham
|
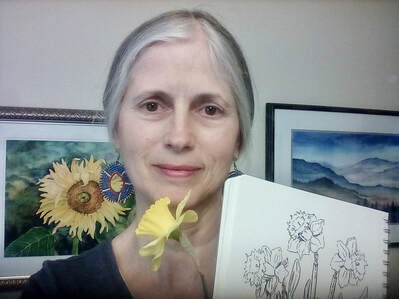
How to have Fun with Daffodils
My husband brought me some daffodil blooms from my front garden just to make me happy. I put them in a vase and decided to sketch them. Whether you do your sketches in front of a live bloom or from a reference photo, remember that the more you draw, the better you will get!
| |||||||
Demo with Shanya Thakur
|
Tie-Dye D.I.Y.
I have had this tie-dye shirt idea for a very long time! During this time of physical distancing, with a lot of time on my hands, I decided to recycle clothing that I stopped wearing or were getting old. This activity is a great way to recycle your clothes and save money on buying new ones. You can easily make it at home and it's a great way to pass your time as well!
| |||||||
Demo with Jacqueline Crawley
|
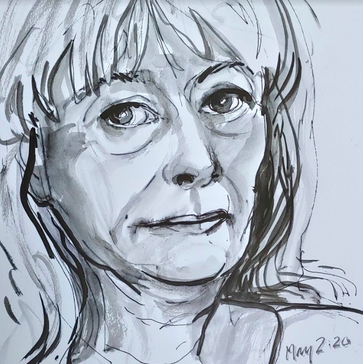
Self-Portrait Sketch
Sketching yourself is a great way to practice drawing techniques. Whether using a picture or looking into a mirror, each sketch will reflect yourself in a different way. I am calling members of our figure drawing group to take up the challenge! Be sure to check out Jacqueline's websites here: artinstructor.net jacquelinecrawley.com
| |||||||
Demo with Sheryl Ali
|
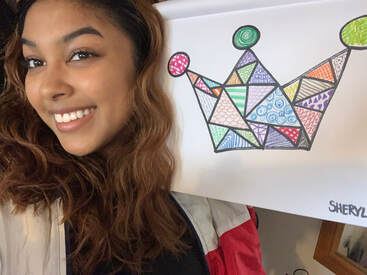
Mandala Madness
Inspired by the geometric design of a Mandala, this activity allows you to explore shape, line and colour. Draw any picture you want to and fill it with as many patterns as possible.
| |||||||
Demo with Karin Fediw
|
Wax-Resist Flowers
A simple way to amp-up your illustrations or explore a different painting technique. The wax will resist the watercolours from covering the lines of your shapes and preserve the original paper. Great for beginners through to advanced artists. Be sure to follow Karin on Instagram: @karin_fediw
| |||||||
Demo with Kelly McNeil
|
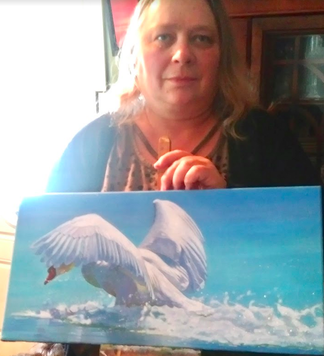
Painting a Mute Swan
Follow along with me to create a painting of this beautiful swan - image captured from my visit to Sir Samuel Smith Park. I documented each step and provide directions so you can recreate this stunning piece using either oil or acrylic paints. Check out Kelly's website here: http://kellymcneil.net
| |||||||
Demo with FCAG
|
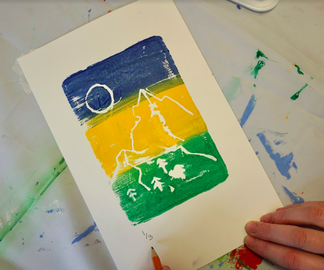
Easy Printmaking with Styrofoam
Printmaking allows artists a chance to explore different techniques and patterns. For this activity there is not a lot of prep needed, plus there is very little cost involved. Once you have a design you like, you can make multiples!
| |||||||
Demo with Nancy Buckingham
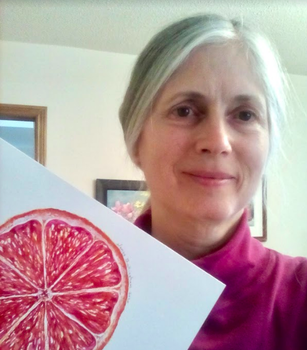
How to Paint a Grapefruit Using Watercolours
|
This lesson can be painted with a variety of fruit in mind. It is a fun painting which looks good with a variety of techniques - for beginner and intermediate levels. Choose your fruit and use a limited pallet of colours for best results. Additional references are provided.
| |||||||
Permanent Collection Features
|
Since 1953, the Group held annual exhibitions at Thistletown Public Hall. In 1971, Dr. Curtin opened the Franklin Carmichael Art Gallery, known as the Garden Gallery. FCAG has since held annual exhibitions featuring works of both emerging and regional artists. Every spring, the Group holds an Annual Members’ Show, which celebrates the artwork of our talented members and students.
|
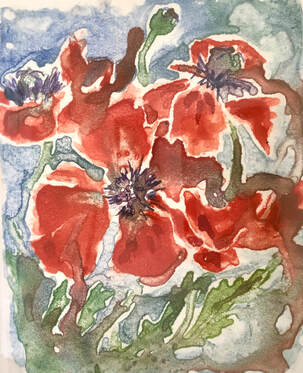
Red Poppies by Jillian Roos-Markowitz, Watercolour
|
Jillian Roos-Markowitz has been involved in the arts for over 40 years. She studied with FCAG artist instructors to master the basics of drawing and explore her love for watercolour. Jillian even served on the Group's Board of Directors as President from 1980-1982. Today, she enjoys the creative challenges that come with being a multi-media artist. You will find her work on display at various galleries throughout Northumberland Hills.
|
Local Work of Art
|
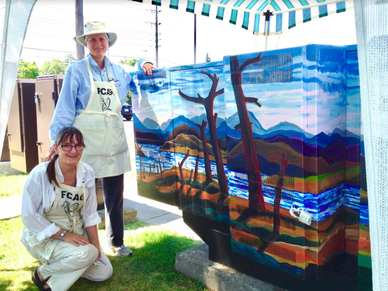
In summer of 2016, FCAG Members and Artist Instructors collaborated to paint an outdoor mural after Franklin Carmichael’s landscapes. Produced in partnership with Community Matters Toronto and Albion Islington Square BIA, the group transformed a non-descript Bell Box into a local work of art – at the corner of Thistle Down Blvd. and Albion Road.
Street Art Toronto developed a map-based app to explore the amazing street art located throughout the city: https://streetartoronto.ca There you will find samples of the beautiful murals by artist Magic Finnga WonG (Basil Jardine), whose work is celebrated throughout North Etobicoke. |
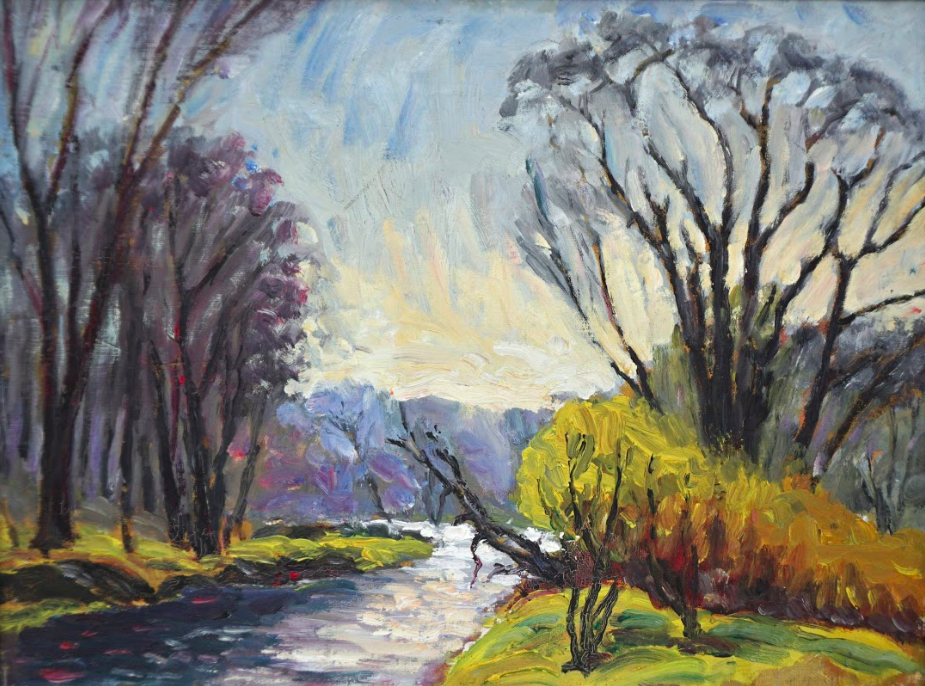
Spring on the Credit - Fred Madill, Oil
|
Frederick Cecil Madill (Fred Madill) was a contemporary of the Group of Seven and an early member of Franklin Carmichael Art Group. After retirement, he pursued a new career as an artist. Under the guidance of artist instructors at FCAG, Fred became an accomplished ‘plein air’ painter. His style is strong, bold and free, depicting Ontario’s landscapes in all seasons. After his death in 1969, his family donated several works to FCAG, which once lived in his home in Thistletown.
|
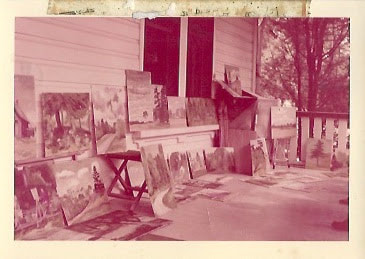
Photograph: Critique at Mrs. Fraser’s, 1958
|
Franklin Carmichael Art Group students were encouraged to explore the principles and techniques of drawing, watercolour and oil painting, both indoors and outdoors. Each June, the Group organized a week of en plein air painting for enthusiastic artists. Students painted on location along West Humber Recreational Trail sites including, Baker Field, Jason Road, and Anga’s Farm. At the end of the week, the Group engaged in instructive and kind-hearted criticism.
|
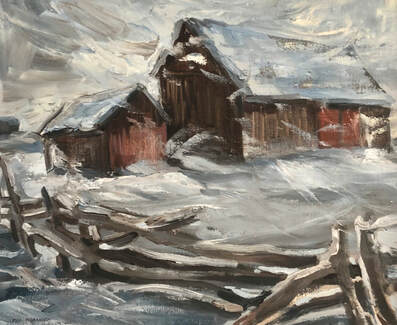
Unknown - Ted Kramolc, Oil
|
Ted Kramolc was an artist, author and architect whose works can be seen in the National Gallery of Canada, the Art Gallery of Ontario, and elsewhere in Canada and Slovenia. Born in 1922, he studied as a painter and architect in Slovenia. Kramolc immigrated to Canada at 26 years old, displaced after the war. Arriving at Pier 21 in Halifax, he travelled west through Canada working for The Canadian National Railway. He returned to Toronto to pursue a degree in Art at the Ontario College of Art and Design. Here he married and raised his twin sons. Before his passing in 2013, he wrote an intimate novel, which explored the complex theme of his “Canadian” identity.
Cited: Urbančič, Anne. “The Spaces that Define Us”. An interview with Ted Kramolc. Glasilo 12.1 (January/February 2008): 39-41. |
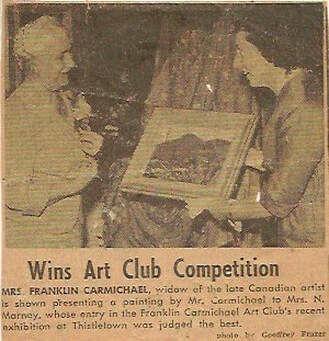
Picture: Ada Carmichael presenting a painting by Franklin Carmichael to Nora Marnie
|
On September 18th 1953, Franklin Carmichael Art Group held its first exhibition at Thistletown Public Hall. Pictured here is Mrs. Carmichael presenting show winner, Nora Marnie, the first Franklin Carmichael Award - a sketch by her late husband entitled, Sombre Valley, 1936. It was Nora’s devoted work and encouragement of others that influenced the Group to establish an annual youth award in her honour. The Nora Marnie Young Artist Award is a monetary award given to a local high school student who demonstrates artistic talent and intends to pursue studies in the arts.
|
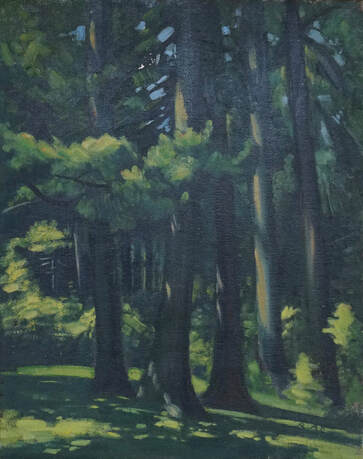
Trees - Agnes Curtin, Oil, 1950s
|
In 1932, Agnes Ann Curtin moved to Thistletown and built a log house on 2.5 acres of land above the Humber River, where she lived and practiced medicine. Dr. Curtin was one of the first female graduates of the Faculty of Medicine at the University of Toronto. Her practice focused on the physical and mental health of women, however she was also a child development expert and youth counsellor. In 1933, she formed a club for local boys who helped her plant an estimated 4000 trees, some of which are detailed in this painting.
|
DIY Calla Lily Abstract String Art
with Sheryl Ali
⬇️ What you will need:
Acrylic Paints ( any colours/optional: black and white)
Paper
Hardcover Book or anything that is flat and heavy
Paintbrush
String of any Optional Size
Plastic or Styrofoam Cups
Scissors
Stirring Stick
⬇️ Instructions:
Step 1: Fill your cups with acrylic paint colours of your choice
Step 2: Cut long string and add it to the cup of paint, be sure to cover it in paint
Step 3: Paint your background either white, black if you want more contrast
Step 4: Lay out your string in either curvy line and at the end rest your string at the middle bottom of your page
Step 5: Close your cover add your book on top to add weight and pressure
Step 6: Push down and pull the string, be sure to keep the string in the middle as you are pushing down
Step 7: Lift for the reveal and add words if you choose to!
DIY How to Sketch an Eye
with Maria Fiat
⬇️ What you will need:
Paper
Pencils
Q-tip/ Blending Stump
Eraser
Sharpener
Optional: Reference Photo & White Pen
⬇️ Instructions:
Step 1: Sketch an almond like shape, with a thin waterline on the bottom, and a tear duct shaft
Step 2: Draw on upper lashes in thin flicking motions (crossing the ends/ connecting the ends of the lashes makes it look more realistic)
Step 3: Draw on lower lashes in thin flicking motions (crossing the ends/ connecting the ends of the lashes makes it look more realistic)
Step 4: Draw a circle in the upper middle part of the eye, this shouldn’t touch the waterline
Step 5: Fill in a large black dot in the middle of the circle (this is the pupil), and shade the inside of the circle
Step 6: Draw thin lines towards the pupil in the circle, and draw some darker blobs around the pupil (to make the eye look more realistic)
Step 7: Taking your white pen, mark some spots near the pupil to imitate a reflection in the eye (this can also be done with an eraser), shade the inner corners of the eye to imitate depth
Step 8: Shade the upper lash line down towards the middle of the eye along with the tear duct
Step 9: Sketch curved lines above the top of the lashes (this is meant to be the fold of the eye/ eyelid)
Step 10: Shade under the eye fold and above the lash line to imitate the curve of the skin above the eye
Step 11: Sketch the general area you want your eyebrow to be
Step 12: Fill in the eyebrow with thin flicking motions to imitate eyebrow hair
Step 13: Darken the eyebrow by shading or pressing down on the pencil while drawing the hairs
Step 14: Shade under the front of the eyebrow to show depth between the eyelid and where a nose would be, and sketch little lines under the eye and shade to imitate skin folds
Step 15: Shade any extra places you would like more dimension and add any extra details
DIY Diffusion Art
with Alicia James
⬇️ What you will need:
Coffee Filter
Coloured Washable Markers
Spray Bottle with Water
Pipe cleaners
Empty Clear Jar
Plastic Table Covering
⬇️ Instructions:
Step 1. Choose a nice workspace with a big enough table that you would be comfortable working on.
Step 2. Lay down your plastic table cloth to protect your table from markings and etc.
Step 3. Get a few coffee filters and layer them together.
Step 4. Grab some washable markers of the colours you want to use to make your design.
Step 5. Draw your design using the washable markers onto only the top first coffee filter.
Step 6. Fill your spray bottle with water.
Step 7. Spray your stack of coffee filters with design.
Step 8. Watch the colours blend together.
Step 9. Let dry for about half an hour to an hour.
Step 10. Now that you have your dried coffee filters, you can start to pinch/scrunch the bottom of your designed coffee filters.
Step 11. Continue to scrunch the bottom until you have something that resembles a flower.
Step 12. Grab your choice of colour pipe cleaner.
Step 13. Begin to twist it onto the little holder (part you are using to hold the flower).
Step 14. Once twisted around fold the stem of the pipe cleaner upwards onto your flower and begin to twine/twist it around.
Step 15. Put your finished flower aside.
Step 16. Grab your clear empty jar.
Step 17. You can now choose to fill the clear empty jar with whatever you like, little stones, multicoloured gems, dyed cotton etc.
Step 18. Place the stem of your flowers into the jar. You now have your own decorative bouquet of flowers!
DIY Animal Mask
with Sheryl Ali
⬇️ What you will need:
Coloured Construction Paper
Scissors
Glue or Tape
Markers or Pencil Crayons or Crayons
String
⬇️ Instructions:
Step 1: Find a animal that you want to be
Step 2: The main colour of your animal should be base of your mask
Step 3: Cut out your eye holes so that you will be able to see out of it
Step 4: Create the shape of the head and add a nose if necessary
Step 5: Add your string to the sides and wear your mask
DIY Watercolour Paint at Home
with Maria Fiat
⬇️ What you will need:
Paint Brushes
Ground Coffee
Coffee Filter
Hot Water
Variety of Teas
Paper
Cups/ Mugs
Paper Towel
⬇️ Instructions:
Step 1: Turn on the kettle to make hot water
Step 2: Put your tea bags/ coffee grounds in a mug or cup (the more tea/coffee the stronger the colour)
Step 3: Pour hot water into cups
Step 4: Let tea/ coffee steep for 1-2 minutes & stir
Step 5: Take your paper and paint! The more layers you put the brighter the colour
